How to adjust the glucose range
The glucose range defines what the app treats as low, normal, and high glucose. It's used for the colors in the Diary, Time in range, the Trends screen, reports, and the widget.
Open Settings and tap Glucose Range. At the top, Current ranges shows your limits.
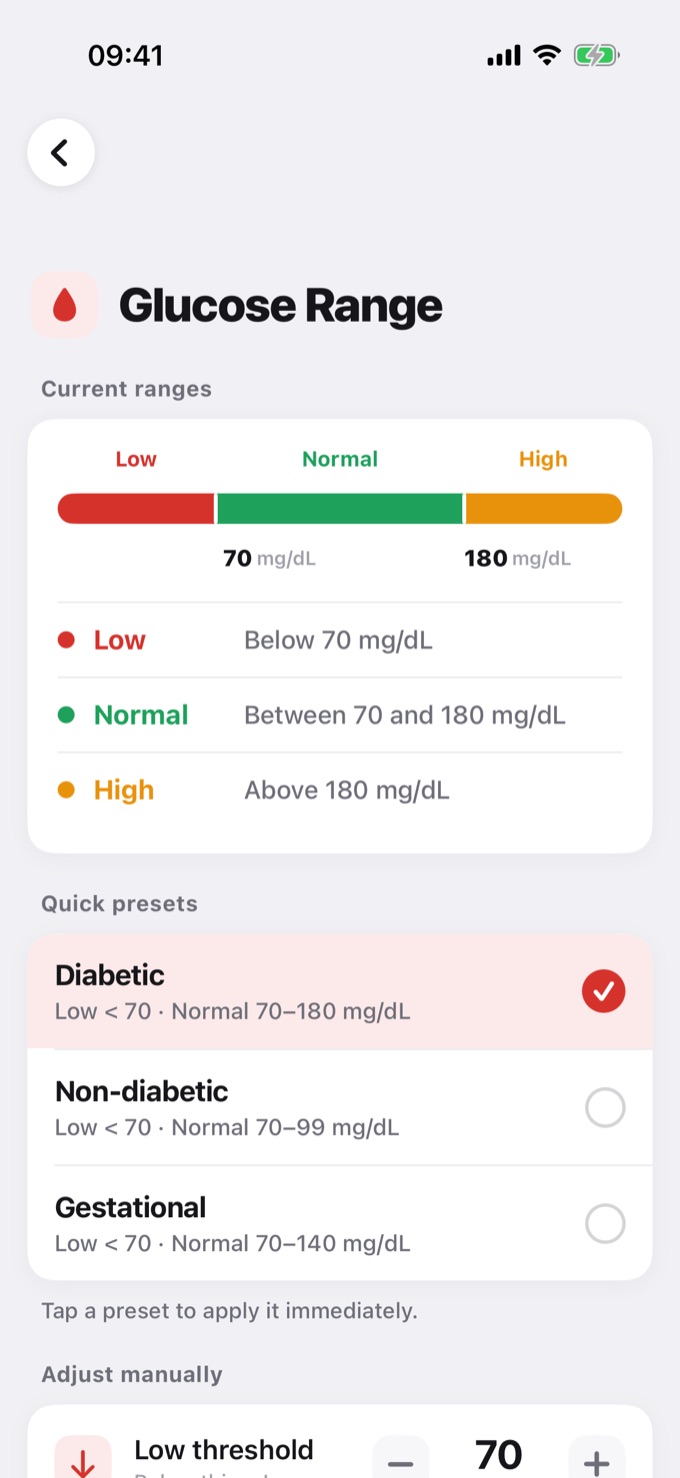
Option 1: quick presets
Tap a preset to apply it right away:
| Preset | Normal range (mg/dL) |
|---|---|
| Diabetic | 70 to 180 |
| Non-diabetic | 70 to 99 |
| Gestational | 70 to 140 |
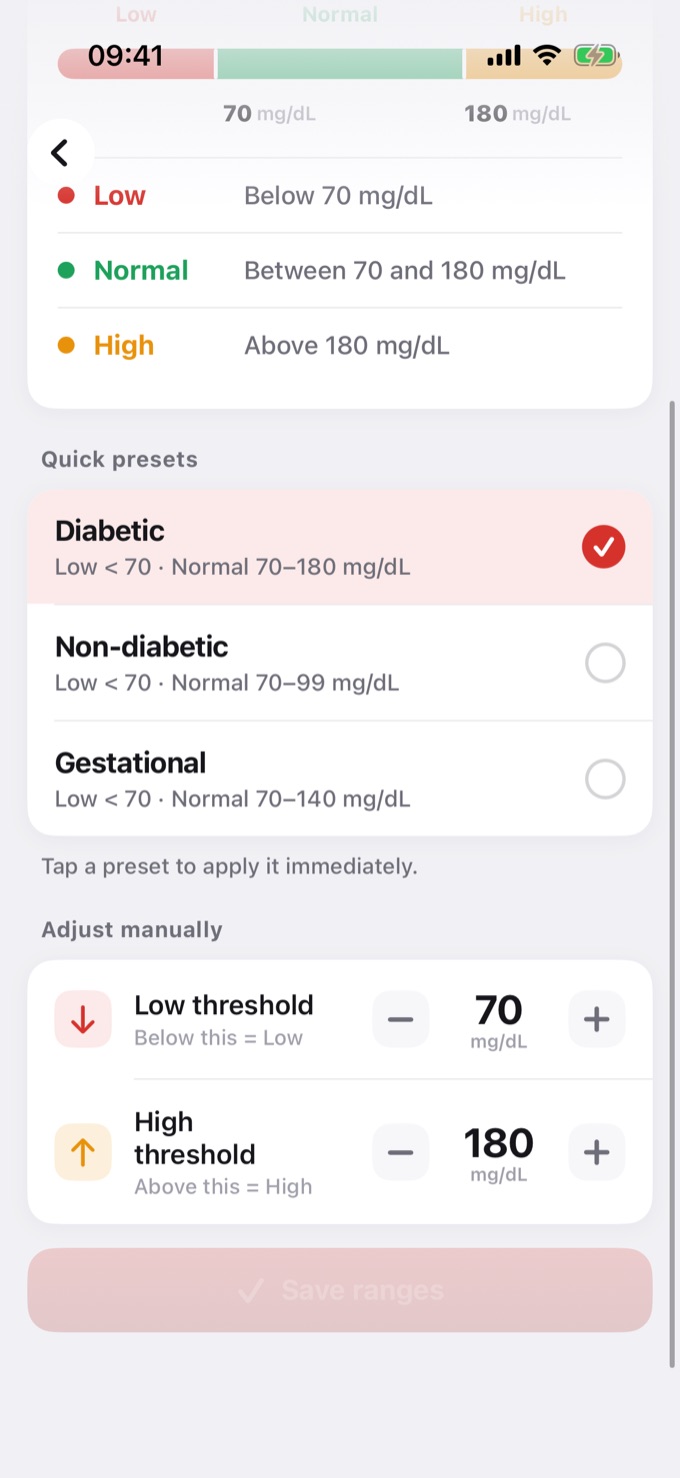
Option 2: adjust manually
Under Adjust manually, use − and + or tap the number to type it:
- Low threshold: below this value, glucose is Low.
- High threshold: above this value, glucose is High.
Then tap Save ranges.
⚠️ Important: the presets are general references. Talk to your doctor about the right range for you.